There are two
preferences that work together to enable this feature. The first one just needs
verification:
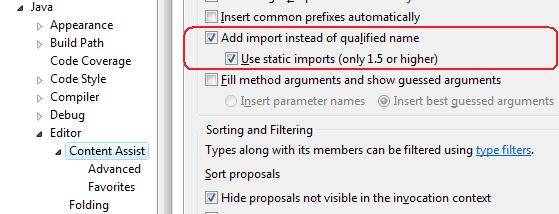
- Go to Window > Preferences > Java > Editor > Content Assist.
- Make sure the option Use static imports (only 1.5 or higher) is enabled (it should be enabled by default, but it’s good to verify this anyway).
Here’s an example of
how it should look:

Next you have to
tell Eclipse which classes you’d like to add as static imports. Here’s how to
do this:
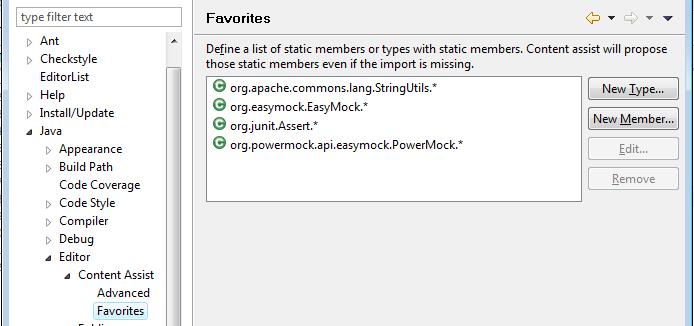
- Go to Window > Preferences > Java > Editor > Content Assist > Favorites.
- Click New Type. This brings up a dialog where you can enter the fully qualified type.
- Enter org.junit.Assert and click Ok (you could also use the Browse… if you want to search for the type). Eclipse will add an entry to the list which reads org.junit.Assert.*.
- Click Ok on the preferences dialog to save and close the preferences.
Here’s what my list
currently looks like:
You can add an entry
for any other static import you’d like, even for a static Utils class you’ve
written yourself.
Now, to test that it
works you can add a JUnit test, type assertEquals,
press Ctrl+Space and press Enter on the appropriate entry. Eclipse will now add
the static import org.junit.Assert.assertEquals
(or org.junit.Assert.*, depending on
your Organize Imports preferences).
As I mentioned
before, this only works for autocomplete and not for organise imports commands
(eg. Ctrl+Shift+O), but it is already a lot better than having to enter the
import yourself and should do the job most of the time.
No comments:
Post a Comment
Please comment here